
Create a flyer with the free Scribus desktop publishing software
Background
Like most desktop publishing programs, Scribus works with frames. That is, you do not drop an image directly into a document; you create a frame for it first. Scribus usually creates the frame for a new item itself, for example, if you insert a photo via the corresponding dialog. Similarly, text, lines, or other elements are also given special frames.
Although frames initially seem somewhat impractical in a flyer project, they are irreplaceable in larger, multipage documents. Start by adding a frame for the background image by selecting Insert | Insert Image Frame. The frame is going to be slightly larger than the entire page. In this way, you avoid white paper showing up in part of the printed document where the background is missing.
Two major trends are popular in background images right now: retro or grunge style and bright colors. A black background is also often used: It provides a good contrast for text of different colors, including white text, and at the same time emphasizes the effect of vivid graphical elements or lively images. However, a light or white background is ideal for airy designs and accentuates pastel graphics and light fonts particularly well.
If you want to make the background pure black, do not add a picture frame; instead, select Insert | Insert Shape | Default Shapes to insert a rectangle (Figure 3). Then, press F2 (or right-click the rectangle and choose Properties) to paint the rectangle black.
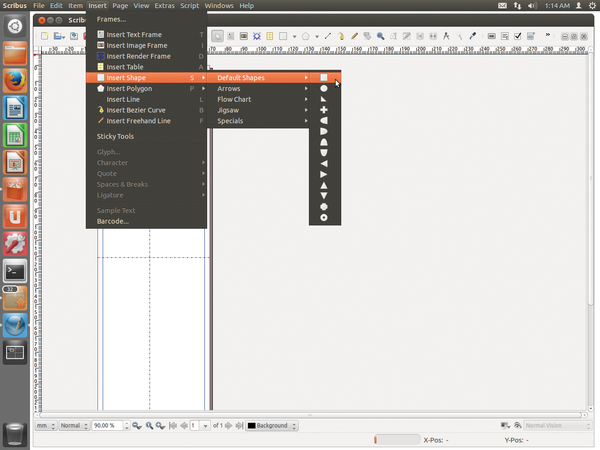 Figure 3: As a background, you can add a black rectangle, which makes all of your colors look brighter.
Retrospective Edits
If you are working with a black background, the guides and borders disappear. Therefore, you need to adjust the settings under File | Document Setup. In the Guides submenu, adjust the Placing in Documents option to In the Foreground. Then, assign the lines a different color so they stand out better from other delimiters.
Text or text snippets can be freely distributed around the flyer. Strict order is typically contradictory to the kind of event the flyer is promoting. Nonetheless, you should still keep a few standards in mind: The name of the organizer and the contact information must be included (Figure 4). Therefore, you should set up space for an imprint on one or even both sides. To do this, insert a small text frame (Insert | Insert Text Frame) and line it up with the lower and outer margins for best results. Then, center the text to give it a harmonious feel.
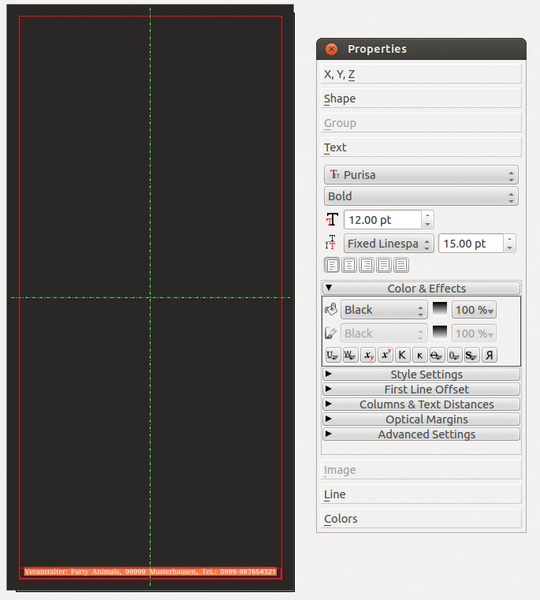 Figure 4: Often neglected: Even a seemingly harmless party flyer needs to have a suitable imprint.
In any case, you will want to assign most of the space to the name and theme of the event. At least the name should appear on both the front and the back of the flyer, and the front thus needs to be visible. For the name and the motto, you can use either a very noticeable font – in a text frame as shown – or a graphic. In the latter case, you need to design the title element, for example, in Inkscape and add it to a picture frame in the flyer.
You need to add more text frames now for the date and time, prices, and any additional information. In the objects properties, you can define the rotation of the text frame as needed. This step results in the typical look that ignores the classical, symmetrical, and straight arrangement of the elements (Figure 5).
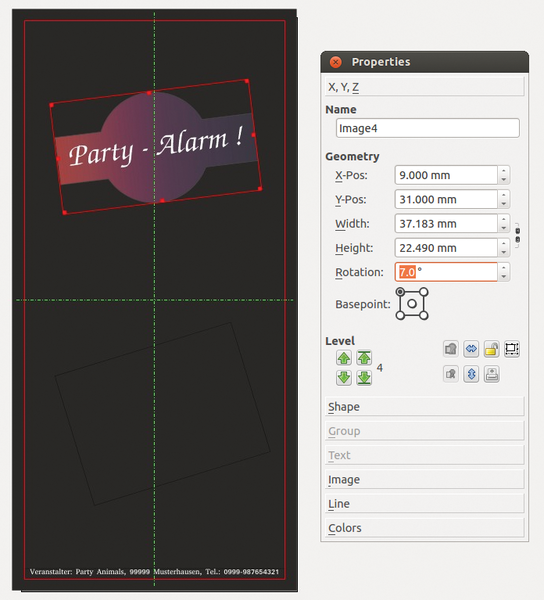 Figure 5: Elements in the flyer should not be strictly straight. You can selectively generate the rotation "free-hand" with the mouse or define it exactly via the Properties dialog.
Arranging Layers of Elements
Before you add more elements and potentially produce a rather confusing structure of chaotically scattered frames, you should familiarize yourself with a few tools.
The visibility of elements results from the relative positions of the individual levels. For the best overview of the existing elements, use the Outline palette, which you open by clicking Windows | Outline. You will then see the pages of the flyer and, below them, in hierarchical order, the individual components – that is, frames for text and graphics, as well as integrated Scribus elements, such as the background polygon in this example. You can use this overview to activate hidden or background objects, if needed.
The easiest way to assign the objects to a layer is with the keyboard. In Item | Level, you can see the keyboard shortcuts to use, or you can change the level here or in the respective object's Properties dialog (Figure 6).
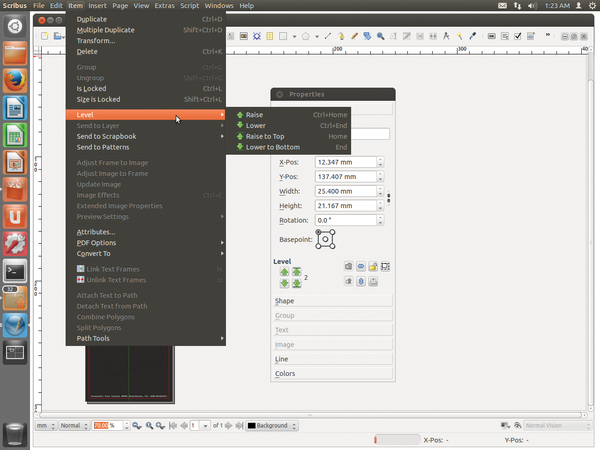 Figure 6: You can simply and flexibly assign levels to items using keyboard shortcuts, via the Item menu, or in the Properties dialog.
« Previous 1 2 3 4 Next »
Buy this article as PDF
(incl. VAT)
Buy Linux Magazine
US / Canada
UK / Australia
Subscribe to our Linux Newsletters
Find Linux and Open Source Jobs
Subscribe to our ADMIN Newsletters
Support Our Work
Linux Magazine content is made possible with support from readers like you. Please consider contributing when you’ve found an article to be beneficial.

News
-
Red Hat Adds New Deployment Option for Enterprise Linux Platforms
Red Hat has re-imagined enterprise Linux for an AI future with Image Mode.
-
OSJH and LPI Release 2024 Open Source Pros Job Survey Results
See what open source professionals look for in a new role.
-
Proton 9.0-1 Released to Improve Gaming with Steam
The latest release of Proton 9 adds several improvements and fixes an issue that has been problematic for Linux users.
-
So Long Neofetch and Thanks for the Info
Today is a day that every Linux user who enjoys bragging about their system(s) will mourn, as Neofetch has come to an end.
-
Ubuntu 24.04 Comes with a “Flaw"
If you're thinking you might want to upgrade from your current Ubuntu release to the latest, there's something you might want to consider before doing so.
-
Canonical Releases Ubuntu 24.04
After a brief pause because of the XZ vulnerability, Ubuntu 24.04 is now available for install.
-
Linux Servers Targeted by Akira Ransomware
A group of bad actors who have already extorted $42 million have their sights set on the Linux platform.
-
TUXEDO Computers Unveils Linux Laptop Featuring AMD Ryzen CPU
This latest release is the first laptop to include the new CPU from Ryzen and Linux preinstalled.
-
XZ Gets the All-Clear
The back door xz vulnerability has been officially reverted for Fedora 40 and versions 38 and 39 were never affected.
-
Canonical Collaborates with Qualcomm on New Venture
This new joint effort is geared toward bringing Ubuntu and Ubuntu Core to Qualcomm-powered devices.