Anonymous Sharing with MediaCrush
Up to Speed
ByYou don’t always need a full-fledged YouTube or Flickr clone to share videos or images. Sometimes all you want is a quick place to upload, so you can link to your media or share it online. MediaCrush gives you just that, as well as some more interesting perks.
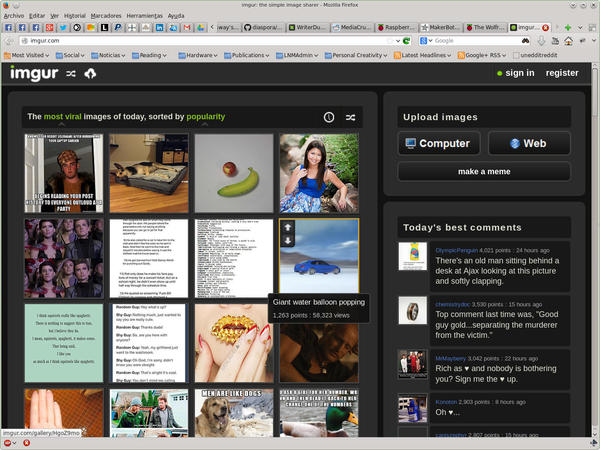
MediaCrush is not a Flickr, YouTube, or SoundCloud stand-in, nor is it meant to be. (If that’s what you need, check out MediaGoblin, which I talked about in an earlier article). MediaCrush works much more like Imgur, which allows you to upload images quickly and easily – no registration required (Figure 1).
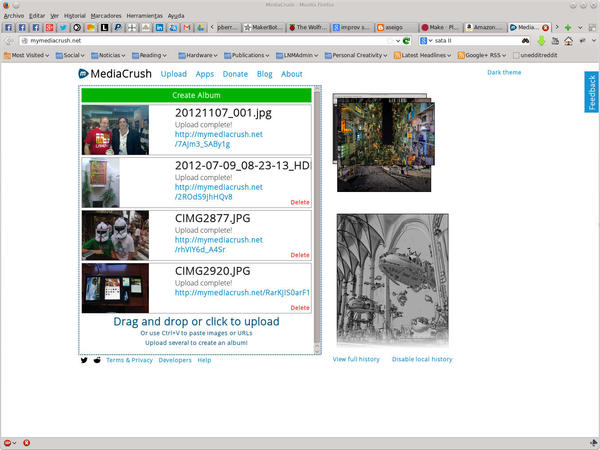
Like Imgur, MediaCrush (Figure 2) does not require registration, and it is absurdly simple to upload images to the site. The main aim of the site is to provide links or code snippets for embedding your media elsewhere. Originally developed specifically for Reddit, it is also 100% RES (Reddit Enhanced Suite) compatible.
It gets better. MediaCrush is completely open source (distributed under a permissive MIT license). Apart from bitmap images, it allows for vector SVG graphics, video, and audio, and it uses all the tricks in the book to compress your files to make your site load faster for your visitors.
For example, when you upload a GIF animation, it will convert it into a losslessly compressed video (OGV or WEBM) and then show the video on your site. A 998KB GIF I tried was compressed down to a 295KB OGV video, a 338% improvement. This has the added advantage of allowing users to pause the animation at any point. If you download the file, MediaCrush will serve you the original GIF image.
Get Ready
MediaCrush comes with a very comprehensive README.md file with instructions on how to install the software. Unfortunately, not all works as described.
As my test machine, I used a stock Debian Wheezy on VirtualBox with all updates applied as of November 26, 2013. When installing Debian, I chose the server option (databases, web servers, etc.).
The first thing you want to do is to get rid of Apache, so it doesn’t hog port 80.
/etc/init.d/apache2 stopapt-get purge apache2
Next, make sure your repos are up to date with no obsolete software hanging around
apt-get updateapt-get upgrade
You have to install Git because you’re going to need it to get MediaCrush’s source. While you’re at it, you might want to grab Vim too, which is useful for editing all the config files later.
apt-get install vim git
The MediaCrush developers also recommend compiling and installing the latest version of ffmpeg to manage and convert video files. But before that works, you’ll have to install some more packages from your repositories:
apt-get install nasm libtheora-dev libvpx-dev libx264-dev \
   libvorbis-dev pkg-config
Now, you can install FFmpeg, as shown in Listing 1.
Listing 1: Installing FFmpeg
$ mkdir /tmp/ffmpeg
$ git clone --depth 1 git://source.ffmpeg.org/ffmpeg.git /tmp/ffmpeg
$ cd /tmp/ffmpeg
$ ./configure --enable-libtheora --enable-libx264 --enable-libvpx --enable-libvorbis --enable-gpl --enable-nonfree
$ make
$ su -c "make install"
Next, you’ll want to install the MediaCrush-specific dependencies,
apt-get install redis-server jhead tidy optipng
and Python-specific dependencies:
apt-get install python-dev libpcre3-dev python-virtualenv
Your system is now ready to install MediaCrush.
Get the Code
Create a directory to store the source code you’re going to get from GitHub,
mkdir mediacrush
and then get the source:
git clone http://github.com/MediaCrush/MediaCrush \
   </route/to/your/>mediacrush
The download shouldn’t take long. Once it’s finished, create a virtual environment for MediaCrush:
virtualenv </route/to/your/>mediacrush --no-site-packages
This will ensure MediaCrush uses only the modules it needs and that it will also not interfere with the rest of the system. Go into your folder and activate the environment:
$ cd </route/to/your/>mediacrush
$ source bin/activate
Now you have to install the Python modules that MediaCrush needs. The requirements.txt file contains a list of all modules Python requires. Using pip, you can install everything in one go:
$ pip install -r requirements.txt
Get Going
Before running the server, you must do several things. First, you have to create a storage directory that will store the uploaded files under your your MediaCrush directory:
$ mkdir storage
Second, you have to adapt and rename the config.ini.sample to config.ini. One of the changes you’ll have to make in this file is on the storage_folder line. You will have to change it from
storage_folder = storage
to the absolute path to your storage directory
storage_folder = </route/to/your/>mediacrush/storage
for everything to work smoothly.
You will also have to change the protocol and domain key-value pairs. Although the official MediaCrush site uses the HTTPS protocol to encrypt traffic to and from the site, for the sake simplicity, change the protocol value to http. For domain, you enter the domain part of your site; for example:
domain = mymediacrush.net
To suit your setup, you may make many other changes in config.ini. For example, you can integrate your Google AdSense and Analytics accounts, include the email of an administrator for abuse reports, or change the location of directories and files.
Finally you have to run the MediaCrush daemon that does all the conversion in the back end:
$ python daemon.py&
The & at the end pushes the execution of the daemon to the background, allowing you to run the server up front in the same terminal. If you enter
$ python app.py
MediaCrush runs in debug mode on port 5000. If you point your browser to the IP of your server, (e.g., http://192.168.1.110:500), you should see a spanking new MediaCrush install waiting for your pics.
Going Public
The above configuration will be okay for a test run, but it won’t do you any good for production. First, the use of port 5000 is no good if you want users to visit your site regularly. It’s too weird. Second, the links and snippets MediaCrush generates for each image, video, or audio file for your sharing pleasure won’t work because they’ll redirect to the wrong address.
The developers of MediaCrush recommend using Nginx as a reverse proxy for your site if you intend to open up to the Internet (also good for an internal network – remember to include a new line in your /etc/hosts files).
apt-get install nginx
You can see a minimal Nginx proxy setup in Listing 2. Type the contents into a text file called mediacrush, and drop it into /etc/nginx/sites-enabled (remember to move the default file out from /etc/nginx/sites-enabled and put it elsewhere). Now restart Nginx.
Listing 2: Minimal Nginx Configuration
server {
  listen 80;
  server_name mymediacrush.net;
  client_max_body_size 25M;

   location / {    proxy_pass <a href="http://127.0.0.1:8000;">http://127.0.0.1:8000;
</a>}
}
The client_max_body_size 25M line limits uploads to 25MB or less. You can change that if you’re not afraid your hard disk will be stuffed with kitty pictures.
Now run MediaCrush with gunicorn:
$ gunicorn -w 4 app:app
Visit http://mymediacrush.net, and – Hey presto! – you should have a perfectly working MediaCrush setup.
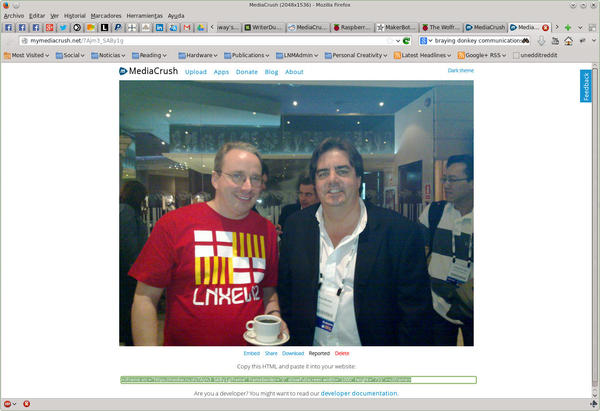
Your site will allow you to upload files by dragging and dropping them onto the box on the main page. If you drag more than one file, you can create an album, grouping them together. If you click on any of your pictures or videos, MediaCrush opens it in a separate window or tab within your browser and gives you the option to either Embed, Share, Download, Report, or Delete.
If you choose Embed, MediaCrush will supply you with an HTML snippet you can include in your website or blog. Sharing gives you a link within your MediaCrush site – a direct link to your image or video – and Markdown, HTML, and BBCode snippets.
A Note on Embedding
To make sure your instance of MediaCrush shows the correct HTML snippet that points to your own site, and not the original https://mediacru.sh site, you have to change the </route/to/your/>mediacrush/mediacrush/static/view.js file (note that those consecutive mediacrush directories are not a mistake). Change the line that says
embed.value = '<iframe src="https://mediacru.sh/' + window.filename + '/frame" frameborder="0" allowFullscreen width="' + size.width + '" height="' + size.height + '"></iframe>'
to
embed.value = '<iframe src="http://mymediacrush.net/' + window.filename + '/frame" frameborder="0" allowFullscreen width="' + size.width + '" height="' + size.height + '"></iframe>'
You will also probably have to hunt down more instances of “https://mediacru.sh” hard-coded into files if you want to personalize your site completely. Places to look are in files stored in the templates/ and docs/ folders.
APPs
MediaCrush also creates a mobile version of your site automatically. Point your smartphone to your site, and you’ll see a simplified version with big buttons for fat fingers (Figure 5).
Two extensions are available – one for Firefox and one for Chrome – that allow you to upload media to mediacru.sh; however, with a little tweaking, they can be made to upload to your site instead. The source for both extensions are written in clear JavaScript, and you would only need to change all the instances of https://mediacru.sh/ within the code to the URL of your own site.
The same goes for the command-line app, MediaCrush-cli. You’ll need to change the line that says
server="https://mymediacru.sh"
to (if you have been following the examples to the letter):
server="http://mymediacrush.net"
A word of caution with regard to the -r recursive option of this app: It does not work as expected. Also, if you have a symbolic link within your directory, you could find yourself uploading more than you expected.
Instead of using recursivity – always a gamble – use:
$ MediaCrush-cli -a somedirectory/*
This will upload all the media into somedirectory and spit out an album link at the end containing all your pics.
Conclusion
MediaCrush not only looks good but also works great. Uploading is easy and fast. The compression functionality boosts the speed at which the media is shown, and visitors will appreciate how simple and straightforward it is to use.
MediaCrush is an excellent way to share or embed media on the web.
Subscribe to our Linux Newsletters
Find Linux and Open Source Jobs
Subscribe to our ADMIN Newsletters
Support Our Work
Linux Magazine content is made possible with support from readers like you. Please consider contributing when you’ve found an article to be beneficial.

News
-
Parrot OS Switches to KDE Plasma Desktop
Yet another distro is making the move to the KDE Plasma desktop.
-
TUXEDO Announces Gemini 17
TUXEDO Computers has released the fourth generation of its Gemini laptop with plenty of updates.
-
Two New Distros Adopt Enlightenment
MX Moksha and AV Linux 25 join ranks with Bodhi Linux and embrace the Enlightenment desktop.
-
Solus Linux 4.8 Removes Python 2
Solus Linux 4.8 has been released with the latest Linux kernel, updated desktops, and a key removal.
-
Zorin OS 18 Hits over a Million Downloads
If you doubt Linux isn't gaining popularity, you only have to look at Zorin OS's download numbers.
-
TUXEDO Computers Scraps Snapdragon X1E-Based Laptop
Due to issues with a Snapdragon CPU, TUXEDO Computers has cancelled its plans to release a laptop based on this elite hardware.
-
Debian Unleashes Debian Libre Live
Debian Libre Live keeps your machine free of proprietary software.
-
Valve Announces Pending Release of Steam Machine
Shout it to the heavens: Steam Machine, powered by Linux, is set to arrive in 2026.
-
Happy Birthday, ADMIN Magazine!
ADMIN is celebrating its 15th anniversary with issue #90.
-
Another Linux Malware Discovered
Russian hackers use Hyper-V to hide malware within Linux virtual machines.


