
Monitoring the network with Zenoss
Installing Zenoss
To set up Zenoss, use either a stack installer or distribution-specific packages. In addition, Zenoss is available in source code, and a virtual appliance is available for VMware.
The stack installer includes dependencies such as MySQL, and it comes with a nice GUI installer that prompts you for the necessary information; however, the stack installer doesn't provide some of the benefits of working through a package management system.
Most of the Zenoss community installs occur on Red Hat Enterprise Linux 5 or CentOS 5 systems. The preferred means of setting up Zenoss on a Red Hat-based system is with the RPM packages.
The Zenoss website [1] has the latest version for download. After you obtain the RPM, execute the following command as root:
yum localinstall --nogpgcheck ./zenoss-<version>.rpm
Once Zenoss and its dependencies are installed, you need to enable and start MySQL:
/sbin/service mysqld start
/sbin/chkconfig mysqld on
Because Zenoss must communicate with other servers, you need the following ports:
- 8080 TCP – web interface
- 162 UDP – SNMP trap
- 514 UDP – Syslog
Start Up
Starting Zenoss will initialize the database. One word of caution: Zenoss assumes that the MySQL root user password is blank and that the database server is running on the same machine. If this isn't the case, you need to edit the /opt/zenoss/bin/zenoss_init_pre file. Having the database on the same machine as the monitoring system is a bit controversial.
Experts often recommend running the database server on a dedicated host. However, with a monitoring system that stores events in the database, putting the database on a separate system introduces an additional point of failure.
To initialize the database and start Zenoss, enter the following command:
/sbin/service zenoss start
To connect to the web interface, point your browser to http://<ipaddress-ordnsname>:8080. The default username is admin and the password is zenoss.
Monitoring with Zenoss
Before you can start monitoring with Zenoss, you need to make sure net-snmp is installed on the system:
yum -y install net-snmp
To set up a minimal configuration file, type the following as root:
echo 'rocommunity zenoss <ipaddress>' > /etc/snmp/snmpd
This line permits the IP address of the Zenoss box to connect to the SNMP daemon running on the Linux server, defining the read-only community name zenoss.
Next, you must open port 161 UDP on the machine you want to monitor. Finally, you need to start the SNMP daemon and set it to start on boot with:
/sbin/service snmpd start
/sbin/chkconfig snmpd on
Within the web interface of Zenoss, click on Add Device in the lower left-hand corner (Figure 3) and enter at least the following:
- The IP address or hostname of the unit you want to monitor.
- The class of machine you are monitoring (/Server/Linux in this case).
- The SNMP community name (zenoss, in this case).
Click on the Add Device button to start collecting data. Although SNMP is the preferred monitoring protocol for Zenoss, you can change it on the Add Devices page. Note that defining the device class is crucial. Zenoss changes what it monitors on the basis of the device class.
 Figure 3: Use the Add Device page to tell Zenoss about a device.
Some monitoring events might already be defined in the Event Console – for instance, to alert you about misconfigurations. To see the event list, click on the Event Console link in the upper-left corner. To add alerts for additional events, click on the Settings link under Management on the left hand menu, then choose the Users tab. Select a user, then click on the Alerting Rules tab (Figure 4). In the Alerting Rules menu, choose Add Rule and provide a name for the rule. After clicking OK, click on the rule that specifies where and how messages are sent, if delayed, and finally, what criteria are used for determining which messages are sent. A single rule can handle a wide swath of alerts, whereas more finely grained alerts might require multiple rules.
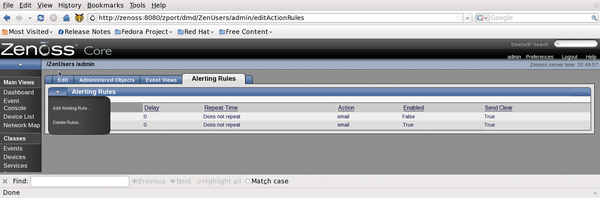 Figure 4: The Alerting Rules tab.
Monitoring a Windows Client
Monitoring a Windows machine also requires preparation on the client side. To begin, you need to install the SNMP service by selecting Start | Control Panel | Add/Remove software | Windows Components | Select SNMP.
Unfortunately, Windows SNMP is severely limited. Zenoss recommends use of the free SNMP Informant add-on instead.
Also, you need to configure the SNMP daemon. To do so, right-click on My Computer and select Manage. Then choose Services, select SNMP Service, right-click, choose Properties, choose the Security tab, add your selected community name, and define it as read-only.
To configure which service accepts SNMP packets from specific hosts, add an entry for your Zenoss server. Now start the service and ensure that it is configured to start automatically on boot. In addition, you'll need to open UDP port 161 so that Zenoss can connect with the Zenoss daemon.
Within the Zenoss web interface, click on Add Device, enter the IP address or hostname, choose the class /Server/Windows, and specify the proper SNMP community string. Data collection begins when you click Add Device.
Because Zenoss also is capable of monitoring via WMI, you should provide Windows credentials to permit collection: Click on Devices/Servers/Windows, choose the zProperties tab, and enter the data in the zWinuser and zWinpassword fields. Remember to prepend the domain if you are passing domain credentials. Entering the domain at the Windows server level means that each Windows machine will use these credentials. If you need a "one-off" configuration for a single machine, you can click on that device's zProperties tab to change the configuration.
« Previous 1 2 3 Next »
Buy this article as PDF
(incl. VAT)
Buy Linux Magazine
US / Canada
UK / Australia
Subscribe to our Linux Newsletters
Find Linux and Open Source Jobs
Subscribe to our ADMIN Newsletters
Support Our Work
Linux Magazine content is made possible with support from readers like you. Please consider contributing when you’ve found an article to be beneficial.

News
-
Gnome OS Adopting systemd-sysupdate
Gnome OS is about to undergo a major under-the-hood change that promises enhanced security.
-
Endless OS 6 has Arrived
After more than a year since the last update, the latest release of Endless OS is now available for general usage.
-
Fedora Asahi 40 Remix Available for Macs with Apple Silicon
If you've been anticipating KDE's Plasma 6 for your Apple Silicon-powered Mac, then you're in luck.
-
Red Hat Adds New Deployment Option for Enterprise Linux Platforms
Red Hat has re-imagined enterprise Linux for an AI future with Image Mode.
-
OSJH and LPI Release 2024 Open Source Pros Job Survey Results
See what open source professionals look for in a new role.
-
Proton 9.0-1 Released to Improve Gaming with Steam
The latest release of Proton 9 adds several improvements and fixes an issue that has been problematic for Linux users.
-
So Long Neofetch and Thanks for the Info
Today is a day that every Linux user who enjoys bragging about their system(s) will mourn, as Neofetch has come to an end.
-
Ubuntu 24.04 Comes with a “Flaw"
If you're thinking you might want to upgrade from your current Ubuntu release to the latest, there's something you might want to consider before doing so.
-
Canonical Releases Ubuntu 24.04
After a brief pause because of the XZ vulnerability, Ubuntu 24.04 is now available for install.
-
Linux Servers Targeted by Akira Ransomware
A group of bad actors who have already extorted $42 million have their sights set on the Linux platform.