Getting Started
Open Hardware – Arduino
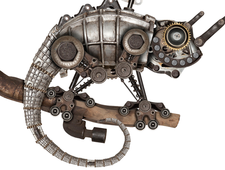
Whether you are building your own device or customizing one, Arduino technology often functions as the foundation for your open hardware project. Here's how to get started with Arduino products.
Arduino single-board microcontrollers [1] were originally intended for educational and do-it-yourself projects. Increasingly, though, they are a foundation for Internet of Things (IoT) projects and open hardware. Sometimes, they are used only for prototyping, but, just as often today, they are found in commercial products ranging from keyboards to prosthetics. If you are involved in open hardware, knowing how to work with Arduino products is quickly becoming essential.
Arduino boards are influential for several reasons. To start, while limited in scope, Arduino boards are powerful enough for many dedicated purposes. If they are not, chaining them or using extension hardware known as shields can easily extend their usability. Just as importantly, Arduino boards can interact with Linux, OS X, or Windows, as well as other single-board microcontrollers like the Raspberry Pi.
Moreover, Arduino offers widespread support for all user levels. This support includes its own IDE and a programming language that is a variant of C, a Creative Commons license, and a community of thousands. With this support, users can begin to work without experience in electronics or programming. At the same time, Arduino is flexible enough to meet the needs of experts as well.
Regardless of whether you are building your own device or customizing a product that uses Arduino hardware, at the heart of working with an Arduino board is customizing the firmware for a board or shield. Exactly what you can do depends on the hardware with which you are working. Since nearly two dozen boards (Figures 1 and 2) and almost the same number of shields are currently available, detailed instructions would fill a book, if not several [2]. What follows is a general overview of how to get started, from preparing to work with the Arduino IDE to flashing the device's firmware.
Installing the Arduino IDE
Regardless of which Arduino board you are working with, the first step is to download and install the Arduino IDE. Different versions of the IDE are available for different operating systems. Especially if you are working with a newer board, you should install the latest version of the IDE, not the one available from your distribution's package repositories. Note that Linux has 32- and 64-bit versions, as well as an ARM version [3].
On Ubuntu, begin installation with the following commands:
cd ~/Downloads tar xvf arduino-1.8.5-linux64.tar.xz sudo mv arduino-1.8.5 /usr/local/arduino cd /usr/local/arduino sudo ./install.sh
Next, check that your regular account is in the dialout
group by running the group
command. If the username is not listed, add it with the commands:
sudo adduser $USER dialout newgrp dialout
You will also need to add dependencies like GCC and Java, as well as make the ARDUINO_PATH
part of your environment:
sudo apt-get install gcc-avr avr-libc sudo apt-get install openjdk-6-jre sudo update-alternatives --config java export ARDUINO_PATH=/usr/local/arduino
Check for any additional instructions for the hardware and your Linux distribution. If you are using an Arduino clone – of which there are as many sold as true Arduino hardware – you may also need to install software for it as well.
To check that the IDE is ready for use, power up your Arduino board or device and plug it into a USB port that is not part of a USB hub without its own power supply, so that it can draw power from your computer. Use Tools | Board to make the IDE recognize the device, and, if necessary, Tools | Port. Then you can test that the IDE and the device are communicating by clicking File | Examples | 01.Basics | Blink to make the LED on the Arduino board flash.
Using the Arduino IDE
The Arduino IDE has its own structure and jargon. In the Arduino
folder created in your home directory the first time you run the IDE, code for the hardware is placed in the hardware
directory. Files containing firmware source code are called sketches (*.ino
) and each is installed in its own separate directory along with the resources required to work with it. Much of the programming can be done within the sketch, but lengthy modifications are sometimes stored in the libraries
subfolders, together with general IDE resources.
You do not need to use the IDE to edit firmware. In fact, many users prefer to use their favorite editor instead. Nothing is wrong with using another editor, but to apply your modifications, be sure they are placed where the IDE can locate them. Moreover, the IDE is filled with useful tools and utilities, including:
- File | Examples: Small bits of code that show you what can be done with Arduino technology and that can be borrowed and modified as needed.
- Files | Preferences: In addition to the general look and feel of the IDE, this dialog sets network connections and the verbosity displayed when code is run.
- Tools | Archive Sketch: Stores the current sketch, protecting it against being accidentally altered or overwritten.
- Tools | Board Info: Displays basic information about any board attached to the computer on which the IDE is installed. Tools | Port needs to be set before you can get information.
These tools are in addition to those found in the Editor menu for automating the writing of code and navigating within a sketch.
Programming
Arduino C, the programming language used to create Arduino firmware is a simplified version of C and C++. Unlike other versions of C, Arduino lacks the header section of a C program. Additionally, a sketch begins with a reserved routine called setup, which is executed only once and contains commands for initializing the hardware. The rest of a sketch is a routine called the loop, which is a block of statements that are repeated over and over until the hardware is disconnected or the sketch is overwritten. When you start a new file in the IDE, code for the setup and loop routines are added automatically. Otherwise, if you are familiar with C programming, you can probably adjust quickly to Arduino C (Figure 3).
If you are not familiar with C programming, you can do far more than you might imagine by modifying examples of the firmware provided with a particular device. You can begin by altering default settings set by the firmware and then experiment with code snippets on your own. You can click Sketch | Verify/Compile to check the validity of your experiments as you work. For those who prefer formal learning, the Arduino site has detailed information about Arduino C [4].
Buy this article as PDF
(incl. VAT)
Buy Linux Magazine
Subscribe to our Linux Newsletters
Find Linux and Open Source Jobs
Subscribe to our ADMIN Newsletters
Support Our Work
Linux Magazine content is made possible with support from readers like you. Please consider contributing when you’ve found an article to be beneficial.
News
-
Systemd Fixes Bug While Facing New Challenger in GNU Shepherd
The systemd developers have fixed a really nasty bug amid the release of the new GNU Shepherd init system.
-
AlmaLinux 10.0 Beta Released
The AlmaLinux OS Foundation has announced the availability of AlmaLinux 10.0 Beta ("Purple Lion") for all supported devices with significant changes.
-
Gnome 47.2 Now Available
Gnome 47.2 is now available for general use but don't expect much in the way of newness, as this is all about improvements and bug fixes.
-
Latest Cinnamon Desktop Releases with a Bold New Look
Just in time for the holidays, the developer of the Cinnamon desktop has shipped a new release to help spice up your eggnog with new features and a new look.
-
Armbian 24.11 Released with Expanded Hardware Support
If you've been waiting for Armbian to support OrangePi 5 Max and Radxa ROCK 5B+, the wait is over.
-
SUSE Renames Several Products for Better Name Recognition
SUSE has been a very powerful player in the European market, but it knows it must branch out to gain serious traction. Will a name change do the trick?
-
ESET Discovers New Linux Malware
WolfsBane is an all-in-one malware that has hit the Linux operating system and includes a dropper, a launcher, and a backdoor.
-
New Linux Kernel Patch Allows Forcing a CPU Mitigation
Even when CPU mitigations can consume precious CPU cycles, it might not be a bad idea to allow users to enable them, even if your machine isn't vulnerable.
-
Red Hat Enterprise Linux 9.5 Released
Notify your friends, loved ones, and colleagues that the latest version of RHEL is available with plenty of enhancements.
-
Linux Sees Massive Performance Increase from a Single Line of Code
With one line of code, Intel was able to increase the performance of the Linux kernel by 4,000 percent.